Introduction to Strawberry Dream Bars
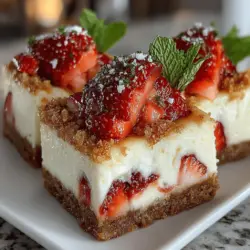
Indulging in a refreshing dessert doesn’t have to be a complicated affair. The Strawberry Dream Bars are the perfect no-bake treat that combines luscious strawberries with a creamy filling and a buttery graham cracker crust. This delightful dessert is a celebration of flavors, where the sweetness of fresh strawberries meets the rich creaminess of a smooth filling, all resting on a crunchy base. Whether you’re preparing for a summer gathering, a birthday celebration, or simply want to enjoy a sweet treat at home, these bars are easy to make and incredibly satisfying to eat. In this article, we will explore the ingredients that make up this delicious dessert, provide a detailed preparation guide, and share some fascinating insights about the Strawberry Dream Bars that will inspire you to make them for your next occasion.
Understanding the Ingredients
Exploring the core components of Strawberry Dream Bars is essential for achieving the perfect balance of flavors and textures. Each ingredient plays a critical role in ensuring that the bars are both delicious and visually appealing.
The Crust: A Foundation of Flavor
– Graham Crackers: The choice of graham crackers is crucial in creating a flavorful and crunchy base for the Strawberry Dream Bars. Their slightly sweet and nutty flavor pairs perfectly with the creamy filling and fresh strawberries. Opting for high-quality graham crackers will enhance the overall taste of the dessert, providing a satisfying crunch that contrasts beautifully with the soft filling.
– Granulated Sugar: Granulated sugar is added to the crust to enhance sweetness and provide a slight caramelization when baked, although in the case of no-bake bars, it simply helps to bind the crust together. The sugar not only elevates the flavor but also complements the sweetness of the strawberries in the filling, creating a harmonious taste experience.
– Unsalted Butter: Using unsalted butter in this recipe allows for better control over the overall saltiness of the dessert. The butter serves as a binding agent that holds the crust together while adding richness and a smooth mouthfeel. It’s important to melt the butter before mixing it with the graham cracker crumbs and sugar, ensuring an even distribution throughout the crust.
The Filling: Creamy and Fruity Harmony
– Cream Cheese: Softened cream cheese is the star of the filling, providing a rich and creamy texture that forms the base of the dessert. It’s vital to ensure that the cream cheese is at room temperature before mixing; this will help achieve a smooth, lump-free consistency that is essential for a luxurious filling.
– Powdered Sugar: Unlike granulated sugar, powdered sugar dissolves easily, allowing for a smooth and creamy filling without any graininess. It sweetens the cream cheese while also enhancing the overall texture, making the filling light and airy.
– Vanilla Extract: Pure vanilla extract adds depth to the flavor profile of the filling, complementing the cream cheese and strawberries beautifully. The aromatic notes of vanilla elevate the dessert, making each bite more enjoyable.
– Heavy Whipping Cream: Whipped cream is crucial in achieving the lightness of the filling. By whipping the heavy cream until stiff peaks form before folding it into the cream cheese mixture, you create an airy texture that contrasts with the denser crust. This step is key to ensuring that the bars have a light and fluffy quality.
– Fresh Strawberries: The freshness and natural sweetness of strawberries are what make this dessert truly special. Using ripe, seasonal strawberries ensures that the filling is bursting with flavor. Their bright red color also adds visual appeal, making the bars as attractive as they are tasty.
The Topping: Finishing Touches
– Fresh Strawberries for Garnish: Garnishing the Strawberry Dream Bars with sliced fresh strawberries not only enhances the visual appeal of the dessert but also reinforces the strawberry flavor in each bite. The glossy, vibrant slices of fruit perched atop the creamy filling create a stunning presentation that is sure to impress your guests.
– Mint Leaves: While optional, adding a few mint leaves can provide a refreshing contrast to the sweetness of the bars. The vibrant green leaves not only add a pop of color but also introduce a hint of coolness that complements the strawberries perfectly.
Step-by-Step Preparation of Strawberry Dream Bars
A detailed guide to preparing these delicious bars will ensure readers can replicate the recipe with ease. Follow these initial steps to create the perfect Strawberry Dream Bars.
Creating the Crust: The Essential Base
1. Combine the Ingredients: Start by crushing about 1 ½ cups of graham crackers into fine crumbs. You can do this by placing the crackers in a zip-top bag and using a rolling pin to crush them or by pulsing them in a food processor. Transfer the crumbs to a mixing bowl and add ¼ cup of granulated sugar. Mix well to ensure the sugar is evenly distributed.
2. Incorporate the Butter: Melt ½ cup of unsalted butter in the microwave or on the stovetop. Once melted, pour the butter into the bowl with the graham cracker mixture. Stir until the crumbs are fully coated and the mixture resembles wet sand. This step is crucial as it provides the binding necessary for the crust to hold together.
3. Press the Mixture into the Baking Dish: Line an 8-inch square baking dish with parchment paper for easy removal. Pour the graham cracker mixture into the prepared dish and use the back of a measuring cup or your hands to firmly press the crumbs into an even layer. Ensure that the crust is compact to prevent it from crumbling when cut.
4. Chill to Firm Up: Place the baking dish in the refrigerator for about 30 minutes. Chilling the crust allows it to set and firm up, making it easier to layer the filling on top without it sinking into the crust.
Crafting the Filling: Key Techniques
1. Beat the Cream Cheese: While the crust is chilling, take 8 ounces of softened cream cheese and place it in a mixing bowl. Using an electric mixer, beat the cream cheese on medium speed until it becomes smooth and creamy. This step is vital as it ensures there are no lumps in your filling, which can detract from the overall texture of the bars.
2. Add the Powdered Sugar and Vanilla: Once the cream cheese is smooth, gradually add 1 cup of powdered sugar and 1 teaspoon of pure vanilla extract. Continue to beat the mixture until it is fully combined and fluffy. The sweetness and vanilla will enhance the cream cheese, creating a delectable filling.
3. Incorporate the Whipped Cream: In a separate bowl, whip 1 cup of heavy cream until stiff peaks form. This means that when you lift the whisk out of the cream, it should hold its shape. Carefully fold the whipped cream into the cream cheese mixture, using a spatula to combine them without deflating the whipped cream. This technique is essential for maintaining the light texture of the filling.
4. Add Fresh Strawberries: Finally, chop about 1 cup of fresh strawberries into small pieces and gently fold them into the filling. The strawberries will add bursts of flavor and color throughout the creamy mixture, making each bite a refreshing experience.
With these initial steps, you will be well on your way to creating the delightful Strawberry Dream Bars. In the next part of this article, we will explore how to assemble and serve these bars, ensuring they are as visually stunning as they are delicious. Stay tuned for the continuation of this sweet journey!
{{image_2}}
Assembling the Filling: Creating the Creamy Layer
Gradually Add Sugar and Vanilla
Once your cream cheese has softened, it’s time to transform it into a luscious filling. Begin by adding the granulated sugar gradually, mixing it thoroughly into the cream cheese with an electric mixer or whisk. This gradual addition ensures that the sugar dissolves completely, preventing a gritty texture and allowing the sweetness to integrate evenly throughout the mixture. Next, introduce the vanilla extract. This aromatic flavoring will complement the strawberries beautifully and enhance the overall taste of the bars. Continue mixing until the mixture is smooth and creamy, ensuring a light and airy texture that will be the foundation of your dream bars.
Whipping the Cream to Stiff Peaks
The next critical element is the whipped cream. In a separate bowl, pour in the heavy cream and beat it with an electric mixer until soft peaks form. This stage is crucial: you want the cream to reach stiff peaks, meaning it holds its shape when you lift the whisk out of the bowl. Properly whipped cream not only adds volume to your filling but also contributes to a light and airy texture that makes these bars feel indulgent yet refreshing.
Folding Whipped Cream into the Cheese Mixture
Once your whipped cream is ready, it’s time to combine it with the cream cheese mixture. The technique of folding is essential here—using a rubber spatula, gently incorporate the whipped cream into the cream cheese mixture. Start by adding a small portion of the whipped cream to lighten the cream cheese base, then gradually fold in the remaining whipped cream. This technique minimizes the loss of air that you’ve worked hard to incorporate. Be gentle but thorough, ensuring that the mixture is homogenous without losing its volume.
Incorporating Strawberries: Maintaining Texture
Carefully Folding in Diced Strawberries
Now comes the star of the show—fresh strawberries! Carefully wash, hull, and dice your strawberries into small pieces. Aim for uniformity to ensure even distribution throughout the filling. When folding the diced strawberries into the cream mixture, be just as gentle as you were with the whipped cream. This step is essential to maintain the airiness of your filling while incorporating the fruity freshness that complements the creamy base. The vibrant red strawberries not only add flavor but also a pop of color that will make your bars visually appealing.
Assembling the Bars: Layering for Success
Pour the Filling Over the Crust and Smooth the Top
With your filling prepared, it’s time to layer it over the chilled crust. Carefully pour the creamy strawberry mixture onto the cooled graham cracker crust, using a spatula to smooth it out evenly. Take your time with this step, as a smooth top will enhance the presentation of your Strawberry Dream Bars. The contrast between the golden crust and the pinkish cream layer will create an enticing appearance that will draw everyone in.
Cover and Chill for Optimal Setting
Once the filling is smoothed out, cover the dish with plastic wrap or aluminum foil. Place it in the refrigerator and let it chill for at least 4 hours or, preferably, overnight. This chilling period is crucial as it allows the filling to set properly, resulting in neat, clean slices when you cut the bars. Patience is key here—while it may be tempting to dig in right away, allowing the bars to chill will enhance their texture and flavor.
Serving and Presentation of Strawberry Dream Bars
Cutting and Serving the Bars
Once your bars are set, it’s time to serve them. To cut the Strawberry Dream Bars into perfect squares, remove them from the refrigerator and use a sharp knife. To achieve clean cuts, warm the knife under hot water, wipe it dry, and gently slice through the bars. This technique reduces sticking and creates a clean edge, enhancing the overall presentation.
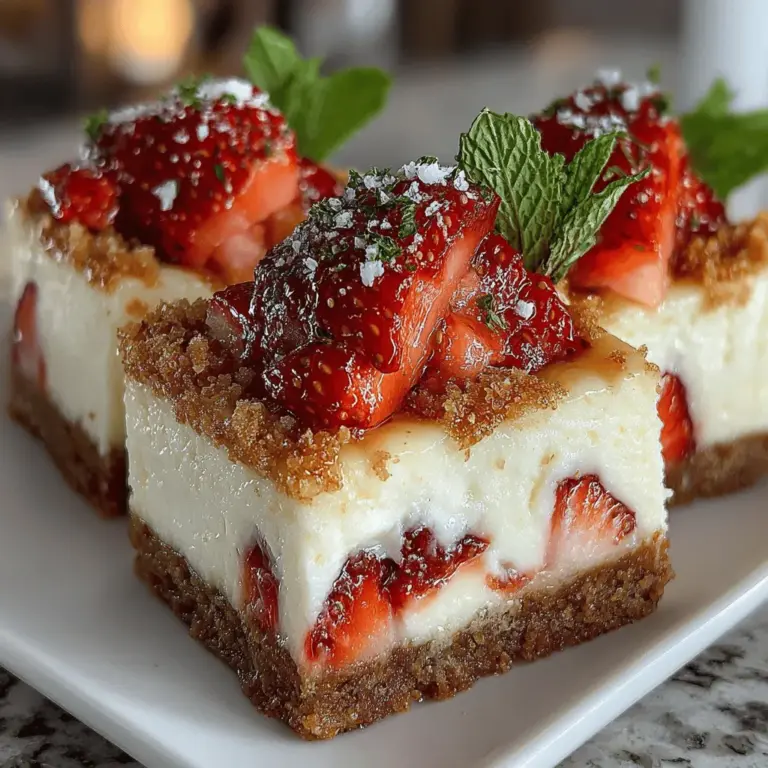
When it comes to serving, consider placing the bars on a decorative platter. A dusting of powdered sugar adds an elegant touch, while a few fresh strawberries and mint leaves can elevate the visual appeal. For an extra special touch, you might drizzle some chocolate sauce or a berry compote over the top to add another layer of flavor and style.
The Appeal of No-Bake Desserts
Convenience and Accessibility
One of the many reasons no-bake desserts like Strawberry Dream Bars are so beloved is their convenience. They require minimal cooking skills, making them accessible to bakers of all levels. With no need for an oven, they are especially appealing during warm months when you want to avoid heating up the kitchen. The simplicity of the preparation—combining, mixing, and chilling—saves time while still delivering a stunning dessert that can impress family and friends alike.
Flavor Versatility
Another exciting aspect of these Strawberry Dream Bars is their versatility. While this recipe highlights the sweet and vibrant flavor of strawberries, you can easily adapt it to suit your taste. Consider swapping out strawberries for other seasonal fruits like blueberries, raspberries, or peaches. You could also experiment with flavorings, such as lemon or almond extract, to create a different fruit-infused masterpiece. The base recipe remains the same, allowing for a variety of delicious variations.
Cultural Significance of Strawberries in Desserts
Symbolism and Occasions
Strawberries hold a special place in the world of desserts, often symbolizing love and passion, making them a popular choice for romantic occasions like anniversaries and Valentine’s Day. Their vibrant red color and sweet flavor evoke feelings of warmth and happiness, making them synonymous with summer celebrations and picnics. In many cultures, strawberries are often used in desserts for weddings and other festivities, symbolizing prosperity and joy. Their seasonal nature adds to their charm, reminding us of the fleeting joys of summer, which makes every bite of the Strawberry Dream Bars even more special.
Conclusion
Strawberry Dream Bars are not just a delightful treat for your taste buds; they are a celebration of simplicity, freshness, and the joys of summer. By mastering the preparation techniques and appreciating the cultural significance of strawberries, you can create an impressive dessert that will wow your guests or simply bring joy to a quiet evening at home. With their creamy texture and vibrant flavor, these bars are sure to become a staple in your dessert repertoire. Enjoy the refreshing taste, and relish the joy of sharing these scrumptious treats with family and friends!