Tropical Bliss Pops: Dive into a Refreshing Summer Treat
Introduction
As the sun shines brightly and temperatures rise, nothing beats a cool, refreshing treat to help you beat the heat. Enter the Tropical Bliss Pops: a delightful summertime indulgence that brings the vibrant flavors of the tropics right to your kitchen. These homemade popsicles are infused with the essence of fresh pineapple and creamy coconut, making them not only a visually appealing treat but also a healthier alternative to the sugary, store-bought frozen desserts that often dominate the market.
Creating your own Tropical Bliss Pops is not only easy but also allows for customization based on your taste preferences and dietary needs. Whether you’re hosting a summer barbecue, trying to keep cool on a hot day, or simply looking for a sweet treat that doesn’t compromise on health, these popsicles are the perfect solution. This article will walk you through the background of this delightful recipe, the ingredients you’ll need, and the initial steps to get you started on your tropical adventure.
Understanding the Ingredients
The foundation of any great recipe lies in its ingredients, and Tropical Bliss Pops are no exception. Here’s a closer look at each component that brings this delectable treat to life.
– Fresh Pineapple: At the heart of the Tropical Bliss Pops is fresh pineapple, renowned for its natural sweetness and vibrant flavor. Pineapple not only adds a tropical flair but also provides essential vitamins and enzymes, making it a nutritious choice. When selecting your pineapple, look for one that is ripe, firm, and fragrant to ensure the best flavor.
– Coconut Yogurt: This creamy base is the key to achieving the rich, indulgent texture of your pops. Coconut yogurt is not only dairy-free but also packed with probiotics, which contribute to gut health. For those who prefer a vegan option, coconut yogurt is a perfect substitute for traditional dairy yogurt, allowing everyone to enjoy these pops without compromise.
– Coconut Milk: To enhance the creaminess of your pops, coconut milk is added. You can choose between canned coconut milk for a richer, fuller flavor or carton coconut milk for a lighter version. Both options will contribute to the tropical essence of the pops but may yield slightly different textures and tastes.
– Sweeteners: To complement the natural sweetness of the pineapple, a sweetener is often included. Honey or maple syrup can be used to add an extra touch of sweetness according to your preferences. Both options provide unique flavors and can easily be adjusted based on how sweet you like your pops.
– Vanilla Extract and Sea Salt: These two ingredients might seem simple, but they play a crucial role in enhancing the overall flavor profile of your Tropical Bliss Pops. Vanilla extract adds a warm and aromatic depth, while a pinch of sea salt helps to balance the sweetness and elevate the other flavors.
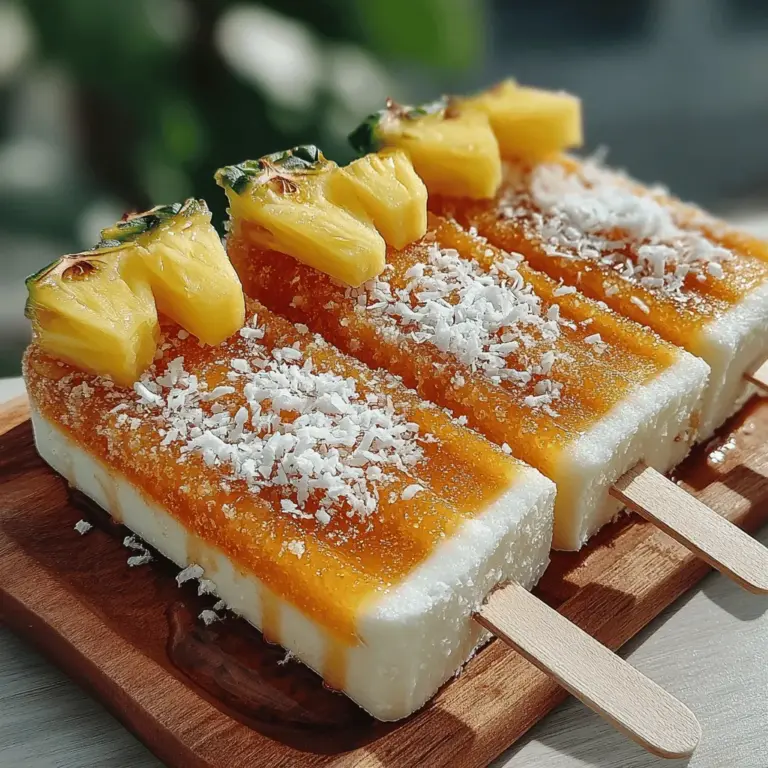
– Optional Garnishes: For those looking to add a decorative touch, consider incorporating shredded coconut or additional pineapple chunks as garnishes. Not only do these add visual appeal, but they also contribute extra texture and flavor to your popsicles.
Preparation Steps for Tropical Bliss Pops
Now that you’re familiar with the ingredients, it’s time to dive into the preparation steps that will lead you to your own batch of Tropical Bliss Pops.
– Blending the Base: Begin by gathering all your main ingredients—fresh pineapple, coconut yogurt, coconut milk, sweetener, vanilla extract, and a pinch of sea salt. Place them into a high-speed blender. The key here is to blend until you achieve a silky smooth consistency. This ensures that your popsicles will have a creamy and enjoyable texture when frozen. Take a moment to appreciate the vibrant colors and tropical aromas as you blend; it’s the first hint of the delicious treat to come.
– Adjusting Sweetness: After blending, it’s time to taste your mixture. This is an essential step, as everyone’s palate is different. Depending on your preference for sweetness, you may want to add more honey or maple syrup at this stage. Simply blend again for a few seconds to incorporate any additional sweetener. This personal touch will make your Tropical Bliss Pops uniquely yours and even more enjoyable.
With these initial steps completed, you’ll be well on your way to making a refreshing batch of Tropical Bliss Pops that are sure to impress. Stay tuned as we continue to explore how to mold and freeze these delightful treats, ensuring they are ready to be enjoyed whenever cravings strike.
{{image_2}}
Adding Texture
For an exciting twist on the classic Tropical Bliss Pops, consider folding in extra pineapple chunks or shredded coconut after blending the creamy mixture. This simple addition not only enhances the flavor but also adds a delightful texture to each pop. The chewiness of the coconut and the juicy bursts of pineapple provide an enjoyable contrast to the smooth, creamy base, making every bite a tropical adventure.
How to Incorporate Additional Ingredients
1. Prepare Your Ingredients: After blending your base mixture, grab your fresh pineapple and shredded coconut.
2. Fold Gently: Using a spatula, gently fold in about ½ cup of finely chopped pineapple and ¼ cup of shredded coconut into the smoothie-like mix. Ensure that they are evenly distributed without over-mixing, which could break down the chunks.
3. Visual Appeal: The added texture will not only enhance the flavor but also create a beautiful visual effect in the pops, making them more appealing when served.
Molding and Freezing the Pops
Pouring into Molds
Carefully transfer the creamy mixture into popsicle molds, ensuring you leave room for expansion. This step is crucial as the mixture will expand when it freezes, and leaving a little space at the top prevents overflow. If you’re using a funnel, it can help avoid spills and mess.
Inserting Sticks
Once the molds are filled, it’s time to place the popsicle sticks. Insert them upright into the center of each mold, making sure they are straight. This will ensure that your popsicles hold their shape and are easy to hold when ready to serve. If your molds come with lids that hold the sticks in place, feel free to use them for added stability.
Freezing Time
Allow the pops to freeze for a minimum of 4 hours. This time frame ensures that they are fully solidified and will retain their shape upon removal. For best results, consider leaving them in the freezer overnight, especially if you’re making a large batch. The longer they freeze, the easier it will be to enjoy them later.
Removing and Serving Your Pops
Easy Release Method
When you’re ready to enjoy your Tropical Bliss Pops, removing them from the molds can be a bit tricky if they are frozen solid. To make this process easier, hold the molds under warm running water for a few seconds. This gentle warmth will help to loosen the pops without melting them too much, allowing for an easy extraction. Be careful not to leave them under the water for too long, as you don’t want to compromise the integrity of your pops.
Presentation Ideas
Presentation can elevate your Tropical Bliss Pops from simple snacks to impressive treats. Serve your pops on a vibrant platter or in a tall glass filled with ice. For a finishing touch, garnish each pop with a slice of fresh pineapple or a sprinkle of shredded coconut. This not only adds a beautiful visual element but also hints at the delicious flavors within. Consider pairing them with colorful summer fruits like mango or berries on the side for a more festive presentation.
Nutritional Benefits of Tropical Bliss Pops
Fresh Ingredients
One of the standout features of these Tropical Bliss Pops is their use of fresh ingredients. Utilizing ripe pineapples and creamy yogurt, these pops are packed with vitamins and probiotics. Pineapples are rich in vitamin C, which supports your immune system and promotes healthy skin, while yogurt offers beneficial bacteria that aid digestion. By choosing whole, fresh ingredients, you’re ensuring that each bite is as nutritious as it is delicious.
Customizable Options
These pops can easily cater to various dietary needs, making them a versatile treat for everyone. If you’re looking to make a vegan version, substitute dairy yogurt for coconut yogurt or almond milk. For those with gluten sensitivities, rest assured that this recipe is naturally gluten-free, as it requires no flour or gluten-containing ingredients. You can even experiment with different fruits or non-dairy milk alternatives to create unique flavor profiles that suit your preferences.
Healthier Alternatives
Making your own Tropical Bliss Pops at home not only allows you to control the ingredients but also helps you avoid the artificial flavors and preservatives often found in commercial popsicles. Many store-bought frozen treats are loaded with added sugars and synthetic ingredients that can detract from their health benefits. By preparing these pops at home, you can enjoy a refreshing, guilt-free dessert that aligns with your health goals.
Conclusion
Creating Tropical Bliss Pops is a delightful and straightforward process that allows you to savor the refreshing tastes of summer all year round. With their vibrant flavors and health-conscious ingredients, these pops are not only a treat for your taste buds but also a fun activity for the whole family. Enjoy the satisfaction of crafting your own frozen delights, and embrace the tropical experience they bring to your table.
So next time you’re looking for a cool treat to beat the heat or a fun project to involve the kids in, remember these Tropical Bliss Pops. They’re sure to become a favorite among friends and family, providing a delicious and nutritious way to indulge in the flavors of the tropics. Whether you’re lounging by the pool or hosting a summer gathering, these pops will undoubtedly be a hit, leaving everyone asking for more. Enjoy your homemade pops, and let the tropical vibes transport you to a sunny paradise!


