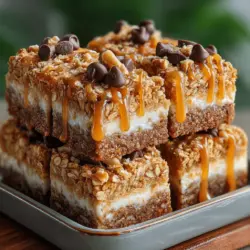
Choco-Oat Dream Bars: A Healthy and Indulgent Snack Recipe
In recent years, the demand for healthy snacks has surged dramatically as more people recognize the importance of maintaining a balanced diet without sacrificing flavor. With busy schedules and the hustle and bustle of daily life, many are seeking quick, nutritious options that can satisfy cravings while also supporting overall health. Enter the Choco-Oat Dream Bars—a delectable treat that perfectly balances nutrition and indulgence. These bars are not only delicious but also packed with wholesome ingredients that make them an ideal choice for anyone looking to enjoy a guilt-free snack.
The beauty of Choco-Oat Dream Bars lies in their simplicity and the fact that they require no baking. This makes them an accessible option for novice cooks and seasoned chefs alike. By using wholesome ingredients such as rolled oats, Greek yogurt, and natural sweeteners, these bars provide a nutritious boost that aligns with modern dietary preferences. Whether you’re looking for a quick breakfast option, a post-workout snack, or a satisfying treat to curb your sweet tooth, these bars deliver on all fronts.
Understanding the Ingredients
Before diving into the recipe, let’s take a closer look at the main ingredients that make up the Choco-Oat Dream Bars. Each component plays a vital role in not only enhancing the flavor but also contributing to the overall nutritional profile of the snack.
Rolled Oats: As the foundation of our Choco-Oat Dream Bars, rolled oats are an excellent source of complex carbohydrates, providing sustained energy throughout the day. They are rich in dietary fiber, which aids in digestion and helps maintain a feeling of fullness. Additionally, oats are known to lower cholesterol levels and stabilize blood sugar, making them an ideal choice for a healthy snack.
Greek Yogurt: This creamy ingredient is packed with protein, making it a fantastic addition to the recipe. Greek yogurt not only adds a rich texture but also contributes probiotics that are beneficial for gut health. It provides a good source of calcium and can help keep you feeling satiated, making it easier to resist less nutritious snacks.
Honey or Maple Syrup: Both honey and maple syrup serve as natural sweeteners, offering a healthier alternative to refined sugars. Honey is known for its antioxidant properties and has been linked to various health benefits, including improved heart health. Maple syrup, on the other hand, contains essential minerals such as manganese and zinc. Choosing either of these natural sweeteners allows you to enjoy a touch of sweetness without the negative impacts of processed sugar.
Almond Butter: This creamy spread is not only delicious but also incredibly versatile. Almond butter is a great source of healthy fats, protein, and vitamins. It helps to create a satisfying texture in the bars while providing essential nutrients that promote heart health and sustained energy.
Dark Chocolate Chips: For many, chocolate is the ultimate indulgence, and using dark chocolate elevates the flavor profile of our Choco-Oat Dream Bars. Dark chocolate is rich in antioxidants and has been shown to improve heart health and brain function. Its deep, luscious flavor pairs perfectly with the other ingredients, making these bars a truly satisfying treat.
Optional Ingredients: To take your Choco-Oat Dream Bars to the next level, consider incorporating nuts, seeds, or dried fruits. Ingredients like walnuts, chia seeds, or cranberries can provide additional texture and nutrients, making your bars even more nutritious and flavorful.
Step-by-Step Instructions for Choco-Oat Dream Bars
Now that we’ve covered the ingredients, let’s move on to the step-by-step instructions for creating your very own Choco-Oat Dream Bars.
Preparing the Baking Dish: Start by gathering your materials. You will need an 8×8 inch baking dish for this recipe. To ensure easy removal of the bars once they’re set, line the dish with parchment paper. This not only helps prevent sticking but also makes cutting the bars into squares a breeze once they are ready.
Importance of Parchment Paper: Parchment paper acts as a non-stick surface, allowing you to lift the bars out of the dish with ease. Without it, you might find yourself wrestling with the mixture, leading to broken bars and a messy cleanup. Make sure to leave some overhang on the sides of the dish, which will help you lift the bars out later.
Combining the Base Ingredients: In a mixing bowl, start by adding the rolled oats, Greek yogurt, almond butter, and your choice of natural sweetener (honey or maple syrup). It’s important to measure your ingredients accurately to achieve the right balance of flavors and textures.
Techniques for Mixing to Achieve the Right Texture: Using a spatula or spoon, gently mix the ingredients until they are well combined. The goal is to create a sticky mixture that holds together but isn’t overly wet. If the mixture seems too dry, you can add a bit more yogurt or almond butter, one tablespoon at a time, until you reach the desired consistency.
Incorporating Chocolate and Nuts: Once your base mixture is ready, it’s time to fold in the dark chocolate chips and any optional nuts or seeds you’ve chosen to add. Stir gently to ensure they are evenly distributed throughout the mixture. This step is crucial for flavor, as you want every bite to include a delicious piece of chocolate or a crunchy nut.
Tips for Even Distribution to Enhance Flavor and Texture: To achieve an even distribution of chocolate and nuts, consider using your hands to mix if the spatula isn’t doing the trick. This allows for a more thorough incorporation of the ingredients while also giving you a better sense of the mixture’s texture. Just be sure to wash your hands beforehand!
Transferring the Mixture to the Baking Dish: Once everything is well mixed, transfer the mixture to the prepared baking dish. Using your spatula, spread it out evenly across the bottom of the dish.
Importance of Pressing Down Firmly for Bar Stability: To ensure your bars hold together well, it’s important to press the mixture down firmly. You can use the back of a measuring cup or your hands to compact the mixture, making sure it’s packed tightly. This step will help your bars retain their shape when cut, minimizing crumbling.
With these initial steps completed, your Choco-Oat Dream Bars are well on their way to becoming a delicious and nutritious snack. The combination of wholesome ingredients and the ease of preparation makes this recipe a go-to for any health-conscious individual looking to indulge without the guilt. Stay tuned for the next part, where we will explore the final steps and how to store your bars for maximum freshness!
{{image_2}}
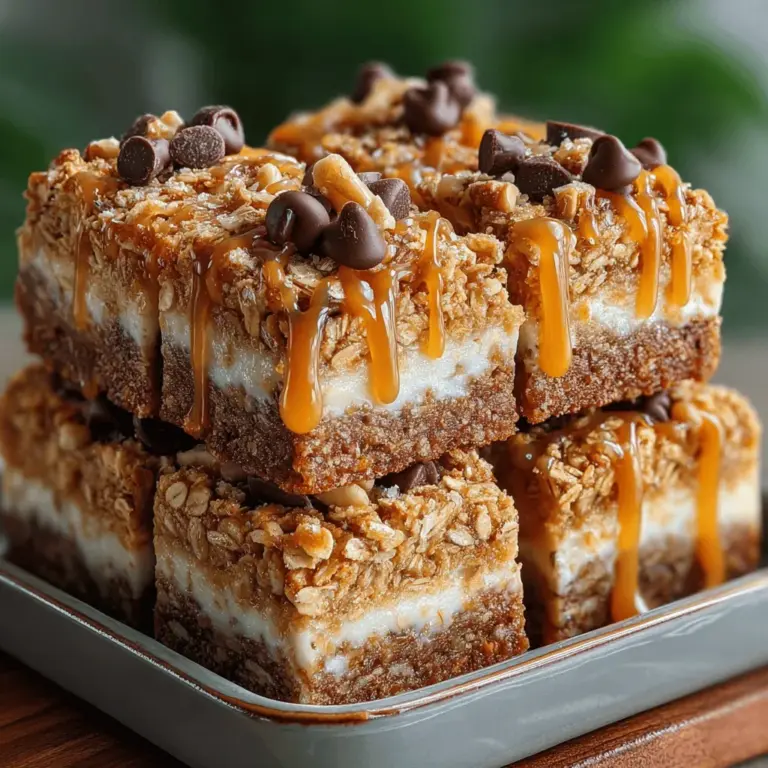
Adding Toppings
Once your Choco-Oat Dream Bars have baked to perfection and cooled down, it’s time to elevate their taste and presentation with some delightful toppings. Toppings not only enhance the visual appeal but also add extra layers of flavor and texture to your bars. Here are some popular topping ideas to consider:
– Chocolate Drizzle: Melt some dark or milk chocolate and drizzle it over the cooled bars for a decadent finish. This adds a glossy sheen and an extra chocolatey flavor.
– Nuts and Seeds: Sprinkle chopped nuts such as almonds, walnuts, or pecans on top for a satisfying crunch. You can also use sunflower seeds or pumpkin seeds for a nutritious boost.
– Coconut Flakes: Toasted coconut flakes add a tropical flair and a chewy texture that pairs beautifully with the chocolate and oats.
– Dried Fruit: Chopped dried fruits like cranberries, cherries, or apricots can offer a sweet and tangy contrast to the rich chocolate.
– Fresh Berries: If serving immediately, fresh berries like raspberries or strawberries can add a burst of freshness and color.
Creative Ideas for Customizing with Additional Flavors
Feel free to get creative with your Choco-Oat Dream Bars by infusing them with various flavors. Here are some ideas to customize them to your taste preferences:
– Nut Butters: Swirl in your favorite nut butter (like almond or peanut butter) into the mixture before baking for added creaminess and flavor.
– Spices: Incorporate spices such as cinnamon, nutmeg, or vanilla extract to bring warmth and depth to the bars.
– Extracts: A few drops of almond or mint extract can transform the flavor profile if you’re looking for something unique.
– Protein Powder: For an extra protein boost, mix in a scoop of your favorite protein powder, making these bars perfect for post-workout refueling.
Freezing Process
After adding your toppings and letting the bars cool completely, freezing is the next step to ensure they set properly and develop the optimal texture.
Explanation of How Freezing Affects Texture and Flavor
Freezing Choco-Oat Dream Bars helps them firm up, making them easier to cut and store. The cooling process also enhances the flavors, allowing them to meld together beautifully. When frozen, the chocolate topping will harden, creating a satisfying contrast with the chewy oat base. It’s essential to wrap the bars individually in plastic wrap or parchment paper before placing them in an airtight container to prevent freezer burn and maintain their delicious taste.
Cutting the Bars
Once your bars are frozen and ready to serve, cutting them into perfect squares or rectangles is crucial for presentation.
Best Practices for Cutting Frozen Treats for Neat Presentation
– Use a Sharp Knife: A sharp knife will ensure clean cuts without crumbling the bars. A serrated knife can also work well for slicing through the chocolate topping.
– Warm the Knife: For an even smoother cutting experience, dip the knife in hot water and wipe it dry before cutting. The warmth will help glide through the bars effortlessly.
– Cut When Partially Frozen: If you prefer softer bars, let them thaw slightly at room temperature for about 10-15 minutes before cutting. This step makes them easier to slice without losing shape.
Storing the Bars
To keep your Choco-Oat Dream Bars fresh and flavorful, proper storage is key.
Proper Storage Methods to Maintain Freshness and Flavor
– Airtight Container: Store the cut bars in an airtight container lined with parchment paper to prevent sticking. Layer parchment paper between the bars if stacking them.
– Refrigerator or Freezer: Depending on how quickly you plan to consume them, you can store the bars in the refrigerator for up to one week or in the freezer for up to three months.
– Labeling: If you’re freezing them, it’s a good idea to label the container with the date and contents to keep track of freshness.
Nutritional Benefits of Choco-Oat Dream Bars
Choco-Oat Dream Bars not only satisfy your sweet tooth but also come packed with nutritional benefits that make them a smart snacking choice.
Detailed Analysis of Calories, Protein, Fats, and Carbohydrates per Serving
Each serving of Choco-Oat Dream Bars (approximately 1 bar) contains:
– Calories: 180
– Protein: 4g
– Fats: 8g
– Carbohydrates: 24g
– Fiber: 3g
– Sugar: 8g
These numbers can vary based on specific ingredients and portion sizes but give a great overview of the nutritional profile.
Discussion of How the Bars Fit into Various Dietary Lifestyles
– Gluten-Free: By using certified gluten-free oats, these bars can easily be made suitable for those with gluten sensitivities.
– Vegetarian: Choco-Oat Dream Bars are naturally vegetarian-friendly, making them a versatile snack option.
– Health-Conscious Snacking: With wholesome ingredients like oats, nuts, and dark chocolate, these bars provide sustained energy and help curb cravings, supporting healthy snacking habits that can contribute to weight management.
Serving Suggestions and Pairings
Choco-Oat Dream Bars are incredibly versatile and can be enjoyed in various ways throughout your day. Here are some serving suggestions:
– As a Pre-Workout Snack: The combination of carbohydrates and protein provides the necessary energy for your workout, making these bars an ideal pre-exercise snack.
– With a Cup of Tea or Coffee: Pair your bars with a warm beverage for a delightful afternoon treat. The chocolate complements the notes in your drink beautifully.
– As a Healthy Dessert Option: Serve them as a guilt-free dessert after dinner, offering a sweet ending to your meal without overindulging.
– Pairing with Fruits or Yogurt: For a balanced meal or snack, enjoy your bars alongside fresh fruits or a dollop of yogurt, adding vitamins and probiotics to your plate.
Conclusion
Choco-Oat Dream Bars are a fantastic way to enjoy a nutritious yet indulgent treat. With their rich chocolate flavor, chewy oats, and customizable toppings, they offer a delightful balance of taste and health benefits. By making these bars at home, you not only control the ingredients but also ensure that each bite is filled with wholesome goodness.
We encourage you to try this recipe and savor the many benefits of homemade snacks. The process of creating these bars can be a fun and rewarding experience that reinforces the importance of healthy eating. Enjoy discovering your favorite variations and serving suggestions, and remember that healthy eating can be both enjoyable and accessible.