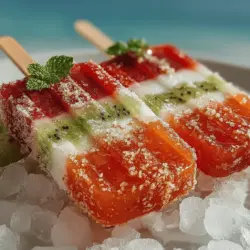
Fruity Kiwi Strawberry Chill Pops: A Refreshing Summer Treat
As the sun shines brighter and temperatures soar, the craving for frozen treats becomes almost irresistible. Summer is the season that beckons for light, refreshing snacks that cool you down while tantalizing your taste buds. While store-bought popsicles are convenient, they often come packed with artificial flavors, preservatives, and excessive sugar. That’s where the Kiwi Strawberry Chill Pops come into play. These delightful frozen treats are not only visually appealing with their vibrant colors but also serve as a healthy and delicious alternative that you can easily make at home.
The allure of these pops lies in their fresh ingredients and the natural sweetness that comes from ripe kiwis and strawberries. The combination of these two fruits creates a refreshing burst of flavor that captures the essence of summer. Whether you’re lounging by the pool, hosting a backyard barbecue, or simply looking for a quick snack, Kiwi Strawberry Chill Pops provide a guilt-free indulgence that satisfies your sweet tooth without compromising on nutrition.
The Health Benefits of Kiwi and Strawberries
Before diving into the recipe, it’s essential to appreciate the health benefits that make these Chill Pops not just tasty but also nourishing. Kiwi, often hailed as a superfruit, is packed with vitamins, minerals, and antioxidants that contribute to overall health. A single kiwi contains a wealth of vitamin C, which supports the immune system, as well as vitamin K, which aids in bone health. Moreover, kiwis are a rich source of dietary fiber, promoting digestive health and helping to maintain a healthy weight.
On the other hand, strawberries bring their own set of health benefits to the table. Rich in antioxidants, particularly anthocyanins, strawberries are known to support heart health by reducing inflammation and lowering blood pressure. They also provide a burst of vitamin C and manganese, both of which play vital roles in maintaining a strong immune system. The natural sweetness of strawberries makes them an excellent alternative to refined sugars, making your popsicles not only delicious but also a healthier option.
Additionally, when preparing your Kiwi Strawberry Chill Pops, consider using natural sweeteners like honey or agave syrup. These alternatives not only enhance the flavor but also come with their own health benefits. Honey, for instance, has antibacterial properties and can soothe sore throats, while agave syrup has a lower glycemic index, making it a suitable choice for those monitoring their sugar intake. Coconut water serves as an excellent hydrating base for the pops, packed with electrolytes that help keep you refreshed and energized on hot summer days.
Gathering Your Ingredients
To create the perfect Kiwi Strawberry Chill Pops, you’ll need to gather a few simple, fresh ingredients. Let’s take a closer look at each component to ensure you get the best flavors and textures in your chilled treats.
– Kiwis: When selecting kiwis, look for fruit that feels slightly soft to the touch, indicating ripeness. The skin should be brown and fuzzy, while the flesh inside should be vibrant green. Avoid kiwis that are overly mushy or have blemishes, as these may not yield the best flavor. Ripe kiwis will provide a sweet, tangy taste that pairs beautifully with strawberries.
– Strawberries: Fresh strawberries are essential for the flavor profile of your pops. Choose berries that are bright red, firm, and free of white or green patches. The sweet aroma is often a telltale sign of ripeness. Opt for organic strawberries if possible, as they tend to have a more pronounced flavor and fewer pesticide residues.
– Honey vs. Agave Syrup: Both honey and agave syrup can be used as natural sweeteners in your pops. Honey offers a rich, floral sweetness and has numerous health benefits, including antioxidants and antimicrobial properties. However, it’s important to note that it is not suitable for vegans. On the other hand, agave syrup has a milder flavor and is vegan-friendly, making it a versatile choice. Ultimately, the choice between the two will depend on your dietary preferences.
– Coconut Water: This hydrating liquid is perfect for the base of your pops. Rich in electrolytes, coconut water keeps you hydrated and adds a subtle sweetness to the mix. When selecting coconut water, choose a brand that is free from added sugars and preservatives for the healthiest option.
– Optional Garnishes: To elevate the visual appeal and flavor of your pops, consider adding fresh mint leaves as a garnish. Mint not only adds a refreshing touch but also complements the sweetness of the fruits, making your pops even more delightful.
Step-by-Step Guide to Making Kiwi Strawberry Chill Pops
Now that you have gathered your ingredients, it’s time to embark on the exciting journey of making your Kiwi Strawberry Chill Pops. The first step in this delicious adventure is preparation. A clean workspace and the right equipment will ensure a smooth process. You’ll need a blender or food processor for mixing the ingredients, popsicle molds for freezing, and sticks or handles for easy enjoyment.
Preparation: Start by washing all your fruits thoroughly under running water to remove any dirt or residues. Next, peel the kiwis and chop them into smaller pieces for easier blending. For the strawberries, remove the green stems and slice them in half if they are large. This will help them blend more easily and release their juices.
Instructions for the Kiwi Mixture: Begin by placing the chopped kiwis into the blender. Add a splash of coconut water to help with blending and to ensure the mixture is smooth. Blend until you achieve a creamy consistency, scraping down the sides as needed. If you prefer a sweeter mixture, now is the time to add a drizzle of honey or agave syrup, adjusting to taste. The goal is to have a smooth, vibrant kiwi puree that will serve as one layer of your pops.
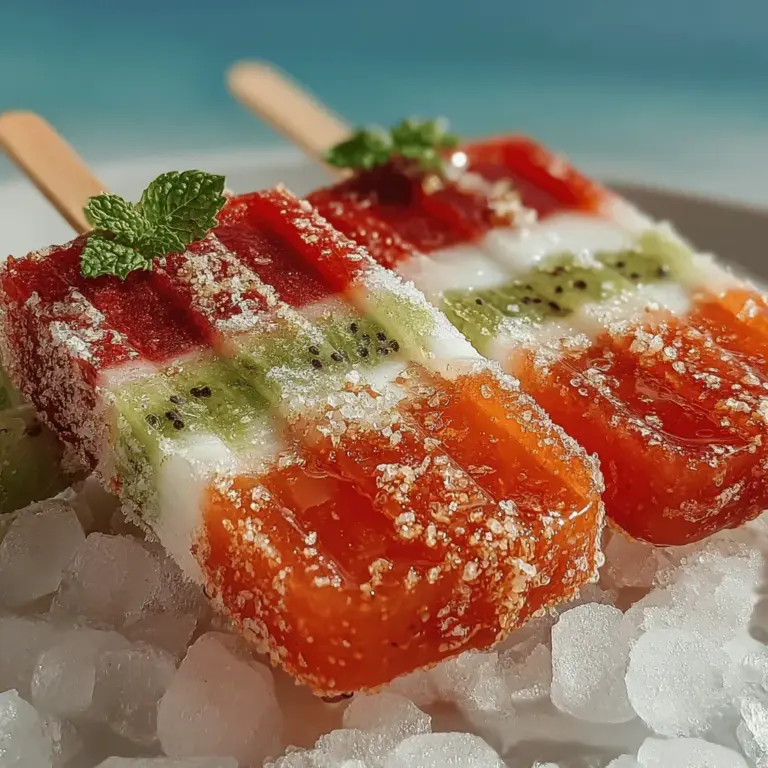
Stay tuned as we continue with the next steps of crafting these refreshing Kiwi Strawberry Chill Pops, where we will combine the fruity flavors and create a delightful summer treat that you and your friends will love!
{{image_2}}
Creating delightful and refreshing Kiwi Strawberry Chill Pops is not only a treat for your taste buds but also a feast for the eyes. This section will delve into the techniques that will help you create stunning layers, ensure optimal flavor, and achieve the perfect texture. We will also cover some essential tips for freezing, serving suggestions, storage, and conclude with a motivational nudge to get you started on your own popsicle-making adventure.
Layering Techniques: How to Achieve Distinct Layers for Visual Appeal
Layering your Kiwi Strawberry Chill Pops is one of the most exciting parts of the process. Not only does it enhance the visual appeal, but it also creates a delightful combination of flavors. Here’s how to achieve distinct layers:
1. Prepare Your Mixtures: Start by preparing your kiwi and strawberry mixtures separately. Ensure that both mixtures are blended until smooth, but still retain some texture for added interest.
2. Layering Order: Begin by pouring a small amount of the strawberry mixture into the bottom of your popsicle molds. Use a spoon or pour gently to avoid splashing. Let this layer freeze for about 30-45 minutes until it is firm.
3. Adding Kiwi Layer: Once the strawberry layer is set, carefully pour in the kiwi mixture. To create a clean separation, you can use the back of a spoon to gently guide the kiwi mixture down the side of the mold before it touches the strawberry layer.
4. Repeat: If desired, alternate the layers between strawberry and kiwi until you reach the top of the mold. Be sure to allow time for each layer to freeze before adding the next.
Creating the Strawberry Mixture: Ensuring Optimal Flavor and Texture
The strawberry mixture is the heart of your pops and should burst with flavor. Here’s how to create the best strawberry base:
1. Choosing Strawberries: Select ripe, sweet strawberries for the best flavor. If strawberries are out of season or lack sweetness, consider adding a touch of honey or maple syrup to enhance the taste.
2. Blending Technique: In a blender, combine fresh strawberries with a splash of lemon juice. The acidity from the lemon brightens the flavor and balances sweetness. Blend until smooth, but avoid over-blending to keep some pulp for texture.
3. Strain (Optional): If you prefer a smoother texture, strain the mixture through a fine mesh sieve to remove seeds and pulp. This step is optional and depends on your texture preference.
Swirling for Aesthetics: Tips on How to Create a Marbled Effect Without Overmixing
Achieving a marbled effect can elevate your pops to gourmet status. Follow these tips for a beautiful swirl:
1. Swirl Technique: After pouring in your layers, take a skewer or a toothpick and gently stir through the mixtures in a figure-eight motion. Do this lightly to avoid overmixing, which can blend the layers instead of creating a distinct marbled look.
2. Don’t Overdo It: The key to a great swirl is subtlety. Swirl just enough to create beautiful patterns without losing the integrity of the layers.
3. Visual Check: Lift the mold and visually check the layers to ensure the colors are still distinct yet beautifully combined.
Adding Garnishes: Strategic Placement for Visual Enhancement
Garnishing your pops not only improves their aesthetics but also adds extra flavor. Here are some ideas:
1. Fresh Fruit: Before freezing, place small pieces of diced kiwi or sliced strawberries into the molds after pouring in your mixtures. This will give a vibrant look and a juicy surprise when bitten into.
2. Herbs: For an unexpected twist, you can add a few mint leaves between layers for a refreshing aroma and taste.
3. Coconut Flakes: Sprinkling shredded coconut on the top layer before freezing can add a tropical flair and an appealing texture.
Freezing Techniques for Perfect Pops
The freezing process is crucial for achieving the right texture and flavor in your popsicles. Here are key freezing techniques:
Importance of Freezing Time: How it Affects Texture and Flavor
– Freezing Duration: Allow your pops to freeze for at least 4-6 hours, or overnight if possible. This ensures they are thoroughly frozen, preventing them from being icy or watery.
– Optimal Temperature: Make sure your freezer is set to a temperature of 0°F (-18°C) or lower. This will help maintain the pops’ texture and prevent ice crystals from forming.
Tips on Inserting Sticks Properly to Ensure They Stay Centered
– Timing: Insert the popsicle sticks when the mixture is partially frozen (about 30-45 minutes after pouring) to ensure they stay upright and centered.
– Placement: Center the stick in the middle of the mold, pushing it down until it touches the bottom. This ensures even freezing and easy removal later.
Methods to Remove Pops from Molds Without Breaking Them
– Warm Water Bath: To easily release the pops, run warm water over the outside of the molds for a few seconds. This will loosen the pops and make removal easier.
– Twist and Pull: Gently twist the popsicle stick while pulling upwards. This motion helps separate the pops from the mold without damaging them.
Serving Suggestions and Pairings
Once your Kiwi Strawberry Chill Pops are beautifully set, it’s time to think about how to serve them. Here are some creative serving suggestions:
Creative Ways to Serve the Kiwi Strawberry Chill Pops
– On a Stick: Simply serve them on their sticks for a casual, fun treat that’s perfect for outdoor gatherings.
– Plated Desserts: For a more elegant presentation, serve them on a dessert plate with a drizzle of fresh fruit sauce or yogurt on the side.
– Ice Cream Social: Incorporate your pops into an ice cream bar where guests can create their own desserts by pairing them with scoops of vanilla or coconut ice cream.
Ideal Occasions for Serving
– Summer Parties: These pops are perfect for summer barbecues, pool parties, and picnics. Their vibrant colors and refreshing taste make them a hit with guests of all ages.
– Kids’ Birthday Parties: Delight children with these fun, healthy treats at birthday parties. They are a great alternative to sugary store-bought popsicles.
Pairing Ideas with Other Summer Treats or Beverages
– Refreshing Beverages: Serve with lemonade, iced tea, or coconut water for a refreshing drink that complements the fruity flavors.
– Fruit Platters: Pair with a colorful fruit platter featuring seasonal fruits like watermelon, peaches, and blueberries for a complete summer treat.
Presentation Tips: How to Make Them Visually Appealing for Guests
– Colorful Serving Platters: Use vibrant platters or bowls to serve your pops. A white platter can make the colors pop even more.
– Garnished with Fresh Herbs: Add sprigs of mint or basil around the serving dish for an aromatic touch that enhances the overall presentation.
Storage and Shelf Life
To maintain the quality of your Kiwi Strawberry Chill Pops, proper storage is essential:
How to Properly Store the Pops to Maintain Freshness
– Airtight Containers: Once fully frozen, transfer the pops to an airtight container or a freezer-safe bag. This prevents freezer burn and preserves their flavor.
– Separation: If stacking pops, place parchment paper between them to avoid sticking together.
Recommended Shelf Life for Optimal Enjoyment
– Freezer Life: For the best taste and texture, enjoy your pops within 1-2 months of freezing. They will still be safe to eat beyond this time, but the quality may decline.
Conclusion
The Kiwi Strawberry Chill Pops are a sensational way to enjoy the vibrant flavors of summer while keeping things healthy and refreshing. With techniques for layering, swirling, and garnishing, you can create visually stunning pops that are as delicious as they are beautiful. By following the freezing techniques and storage tips, your homemade treats will remain delightful for weeks.
We encourage you to try making these pops at home, exploring the joy of creating your own refreshing treats with fresh ingredients. Share the experience with friends and family, and enhance your summer gatherings with these homemade delights. Your guests will surely appreciate the effort and enjoy every bite of these fruity pops!