
Garlic Butter Parmesan Dinner Rolls: A Flavorful Side Dish
Dinner rolls have long been a beloved staple at tables around the world, serving as the perfect accompaniment to a variety of meals. Their fluffy texture and comforting warmth make them a favorite choice for family gatherings, holiday feasts, and even casual weeknight dinners. Among the many variations, Garlic Butter Parmesan Dinner Rolls stand out for their unique and enticing flavor combination. The aromatic garlic paired with the rich, salty notes of Parmesan cheese creates a mouthwatering experience that takes the humble dinner roll to an entirely new level.
Homemade rolls, in particular, offer a sense of satisfaction and comfort that store-bought options simply cannot replicate. The process of making your own rolls allows you to control the ingredients, ensuring freshness and quality while also providing a delightful baking aroma that fills your kitchen. As you knead the dough and watch it rise, you create not just a side dish, but a labor of love that can elevate any meal.
In this blog post, we invite you to explore the delightful recipe for Garlic Butter Parmesan Dinner Rolls. Whether you’re looking to impress dinner guests or simply treat your family to a delicious homemade side, these rolls are sure to please.
Understanding the Ingredients
To create the perfect Garlic Butter Parmesan Dinner Rolls, it’s essential to understand the key ingredients that work together to achieve their delicious flavor and texture. Each component plays a vital role in the overall outcome of the recipe.
All-Purpose Flour: The foundation of the dough, all-purpose flour provides the structure and body needed for the rolls. It contains the right balance of protein to develop gluten, which is crucial for achieving that fluffy, airy texture we all love in a great dinner roll.
Instant Yeast: Yeast is the magic ingredient that causes the dough to rise. Instant yeast, in particular, is favored for its ability to work quickly without needing to be activated in water beforehand. This means you can mix it directly with the dry ingredients, saving time while still achieving a light and fluffy roll.
Sugar: While sugar enhances the sweetness of the rolls, its primary role in this recipe is to feed the yeast. As the yeast consumes the sugar, it produces carbon dioxide gas, which causes the dough to rise. This not only helps in creating a light texture but also adds a subtle flavor depth.
Salt: Salt is crucial in balancing flavors and enhancing the overall taste of the rolls. Additionally, it strengthens the dough structure by tightening the gluten strands, resulting in a more resilient and chewy texture.
Butter: Adding richness and moisture, butter is a key ingredient that elevates the rolls from ordinary to extraordinary. It contributes a delicious flavor and helps keep the rolls tender and soft.
Garlic: The star of this recipe, garlic infuses the rolls with a savory aroma and flavor that is simply irresistible. Whether using fresh garlic, roasted garlic, or garlic powder, it adds a warm, comforting element to each bite.
Parmesan Cheese: This cheese brings a nutty and salty taste that complements the garlic beautifully. The addition of Parmesan not only enhances the flavor profile but also provides a delightful texture that makes these rolls stand out.
Fresh Parsley: While optional, a sprinkle of fresh parsley not only adds a pop of color but also provides a hint of freshness to balance the rich flavors of garlic and cheese.
Preparing the Dough
Now that we’ve covered the essential ingredients, let’s dive into the step-by-step process of preparing the dough for your Garlic Butter Parmesan Dinner Rolls. The method is straightforward and can be tackled by bakers of all skill levels.
Step 1: Activating the Yeast
Begin by activating the yeast, which is crucial for a successful rise. In a mixing bowl, combine warm water (about 110°F) with sugar and sprinkle the instant yeast on top. Let it sit for approximately 5-10 minutes until it becomes frothy. This step ensures that the yeast is alive and ready to work its magic.
Step 2: Mixing Dry Ingredients
In a separate bowl, whisk together the all-purpose flour and salt. Mixing these dry ingredients beforehand helps to distribute the salt evenly, preventing any pockets of salt that could inhibit yeast activity.
Step 3: Combining Wet and Dry Ingredients
Once the yeast is activated, pour the yeast mixture into the bowl containing the dry ingredients. Add melted butter and minced garlic at this stage. Using a wooden spoon or a dough whisk, stir the mixture until a shaggy dough begins to form.
Step 4: Kneading the Dough
Transfer the dough onto a lightly floured surface. Knead the dough for about 8-10 minutes until it is smooth and elastic. You can tell it’s ready when it springs back slightly when pressed. This step is essential for developing gluten, which will give the rolls their structure and chewiness.
The Rising Process
After kneading, shape the dough into a ball and place it in a lightly greased bowl, turning it to coat the surface with oil. Cover the bowl with a clean kitchen towel or plastic wrap and allow the dough to rise in a warm, draft-free environment. This first rise typically takes about 1 to 1.5 hours or until the dough has doubled in size.
As you wait for the dough to rise, the yeast will work diligently, producing carbon dioxide gas that creates air pockets within the dough. This process is essential to achieving the light and fluffy texture that defines perfect dinner rolls. The anticipation builds as you envision the delicious rolls that await, infused with garlic and Parmesan, ready to complement any meal.
Stay tuned for the next part, where we’ll guide you through shaping the rolls, the second rise, and the final baking process to achieve that golden-brown, irresistible finish.
{{image_2}}
Importance of a Warm Environment for Dough Fermentation
Creating the perfect Garlic Butter Parmesan Dinner Rolls begins with understanding the fermentation process of the dough. Yeast thrives in warm conditions, making it essential to provide an ideal environment for the dough to rise. The optimal temperature for fermentation is typically between 75°F to 85°F (24°C to 29°C). If your kitchen is cooler, consider placing the dough in a slightly warmed oven (turned off) or near a heating source, but be cautious not to overheat the dough, as temperatures above 120°F (49°C) can kill the yeast.
Signs to Look For to Know When the Dough Has Risen Enough
Patience is key when it comes to allowing your dough to rise. Look for these signs to determine when your dough has risen sufficiently:
1. Size Increase: The dough should approximately double in size.
2. Poke Test: Gently poke the dough with your finger; if the indentation remains and does not spring back, it’s ready for the next step.
3. Surface Appearance: The surface of the dough should appear smooth and slightly glossy.
The Second Rise: Enhancing the Texture and Fluffiness of the Rolls
After shaping the rolls, they will undergo a second rise, which is crucial for achieving that light and fluffy texture we all love. This rise typically lasts about 30 minutes to an hour. During this time, the rolls will puff up even more, creating the perfect airy structure.
Techniques for Shaping the Rolls After the First Rise
Once your dough has completed its first rise, it’s time to shape the rolls. Here are some techniques to ensure they’re uniform in size and shape:
1. Divide the Dough: Use a bench scraper or knife to divide the dough into equal portions, typically about 2 ounces each for dinner rolls.
2. Pre-shape: Gently shape each piece into a round ball by tucking the edges underneath to create tension on the surface.
3. Final Shape: Place each ball in your baking dish or on a baking sheet lined with parchment paper. Make sure they’re close together but not touching.
Covering the Rolls During the Second Rise for Optimal Conditions
To create the perfect environment for the second rise, cover the rolls with a clean kitchen towel or plastic wrap. This helps retain moisture and prevents the surface from drying out. If your kitchen is particularly dry, a light mist of water over the rolls can also help keep the dough moist.
Creating the Garlic Butter Mixture
Now, let’s dive into the flavorful garlic butter mixture that will coat our rolls. This step is essential for achieving that rich, garlicky taste that elevates the rolls to another level.
Detailed Process of Making the Garlic Butter
1. Melt the Butter: Start by melting unsalted butter in a small saucepan over low heat. Aim for a steady, gentle melt without boiling to preserve the flavor.
2. Sauté the Garlic: Add minced garlic to the melted butter. Sauté on low heat for about 2-3 minutes until the garlic is fragrant and softened but not browned. Browning can lead to a bitter taste, so keep a close watch.
Importance of Sautéing Garlic to Release Flavor Without Burning
Sautéing garlic in butter not only infuses the fat with flavor but also ensures that the raw bite of garlic mellows out, creating a harmonious blend of taste. This step is crucial; burnt garlic can overpower the delicate flavor of the rolls and create an undesirable bitterness.
Combining Butter with Parmesan: Techniques for Even Distribution
Once the garlic is sautéed, remove the pan from the heat and stir in grated Parmesan cheese. The warmth of the butter will help the cheese melt slightly, allowing it to blend beautifully into the mixture. For best results, use freshly grated Parmesan, as pre-grated varieties may contain anti-caking agents that can affect the texture.
Shaping and Baking the Rolls
With the garlic butter prepared, it’s time to finish shaping and baking those delicious rolls.
Shaping the Rolls: Best Practices for Uniform Size and Texture
After the second rise, gently flatten each roll and reshape it into a ball. This technique helps to create surface tension, which is necessary for achieving a beautiful rise in the oven. Ensure each roll is uniform in size; this will help them bake evenly.
Brushing with Garlic Butter: Timing and Techniques for Maximum Flavor
Before baking, generously brush each roll with your prepared garlic butter mixture. Be sure to brush the tops and the sides for maximum flavor. For an extra touch, reserve some of the garlic butter to brush on the rolls immediately after they come out of the oven.
Baking Tips: Ensuring Perfect Golden-Brown Rolls
Preheat your oven to 375°F (190°C) before placing the rolls inside. Bake the rolls for 15-20 minutes or until they are golden brown. Keep an eye on them during the last few minutes of baking; if they are browning too quickly, you can cover them loosely with foil to prevent burning.
Identifying Doneness Through Sound and Appearance
To check for doneness, tap the bottom of a roll; it should sound hollow. Additionally, the tops should be golden and slightly firm to the touch. Trust your instincts and use these sensory cues to ensure perfectly baked rolls.
Serving Suggestions
Presentation can elevate your Garlic Butter Parmesan Dinner Rolls and make them even more enticing.
Presentation Ideas for Serving Garlic Butter Parmesan Dinner Rolls
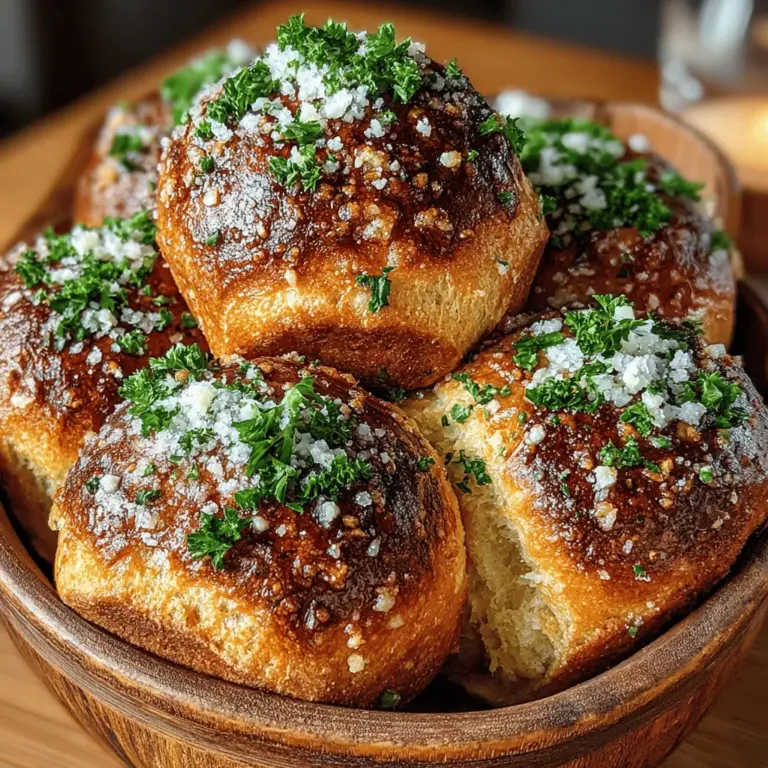
1. Rustic Wooden Board: Serve the rolls on a rustic wooden board for a farm-to-table feel. Place a small bowl of extra garlic butter on the side for dipping.
2. Cloth-Lined Basket: Another option is to use a cloth-lined basket for a warm, inviting look. The cloth helps keep the rolls warm and adds a cozy touch.
Garnishing with Parsley and Additional Cheese for Visual Appeal
To enhance the visual appeal of your rolls, consider garnishing with freshly chopped parsley or a light sprinkle of additional grated Parmesan. This not only adds color but also hints at the delicious flavors within.
Pairing Suggestions: Ideal Meals to Complement the Rolls
Garlic Butter Parmesan Dinner Rolls are incredibly versatile and can complement a variety of dishes. Here are some excellent pairing suggestions:
– Soups: Serve alongside a hearty minestrone or creamy tomato soup for a comforting meal.
– Salads: Pair with a fresh green salad topped with a light vinaigrette to balance the richness of the rolls.
– Main Dishes: These rolls are an excellent addition to roasted chicken, beef stew, or pasta dishes, providing the perfect vehicle for soaking up sauces.
Conclusion
Making homemade Garlic Butter Parmesan Dinner Rolls is a delightful culinary experience that brings joy to both the cook and those fortunate enough to enjoy them. The process of creating soft, fluffy rolls infused with rich garlic and Parmesan flavor is incredibly satisfying, and sharing them with family and friends creates lasting memories.
I encourage you to try this recipe and experience the deliciousness firsthand. The joy of serving warm, fresh rolls at family meals or gatherings is unmatched. With each bite, you’ll savor the delightful flavors and appreciate the effort that went into creating these scrumptious rolls. So gather your ingredients, embrace the process, and enjoy the warm, buttery goodness of Garlic Butter Parmesan Dinner Rolls.
