
Introduction
Indulging in sweet treats is one of life’s greatest pleasures, but what if you could enjoy them guilt-free? Enter No-Bake Cookie Dough Cups—your new favorite dessert that combines the irresistible flavors of cookie dough with the creamy richness of chocolate. This recipe offers a healthier twist on a classic favorite, making it perfect for any occasion. Whether you’re looking for a quick snack, a party treat, or simply a dessert to enjoy at home, these cookie dough cups are sure to satisfy your sweet tooth without the hassle of baking.
The allure of cookie dough delights many, often evoking memories of standing on tiptoes in the kitchen, eagerly sneaking spoonfuls of that luscious mixture right from the mixing bowl. However, traditional cookie dough is typically made with raw eggs and flour, raising concerns about safety and health. The No-Bake Cookie Dough Cups address these issues by utilizing safe, wholesome ingredients that not only enhance flavor but also provide nutritional benefits. This makes them a guilt-free indulgence that everyone can enjoy.
Understanding No-Bake Desserts
Exploring the World of No-Bake Recipes
No-bake desserts are a category of sweets that do not require an oven for preparation. They are often quicker to make and require fewer steps than traditional baking, making them an ideal option for those who may be short on time or looking for a simpler method to satisfy their sweet cravings. No-bake recipes typically rely on ingredients that can set or firm up in the refrigerator or freezer, allowing them to set without heat.
One of the primary benefits of no-bake desserts is their versatility. They can be adapted to various dietary preferences, including vegan and gluten-free options, making them accessible to a wider audience. No-bake desserts are not only quick and easy to prepare; they also allow for creativity in flavor combinations and ingredient substitutions. The No-Bake Cookie Dough Cups are a perfect example of how you can transform a classic recipe into a modern, healthier treat.
The appeal of cookie dough flavors in desserts is undeniable. The sweet, buttery essence paired with a hint of vanilla and the delightful crunch of chocolate chips creates a flavor profile that is hard to resist. By crafting a no-bake version, you can enjoy all the nostalgic flavors of cookie dough while sidestepping the concerns associated with raw ingredients.
Ingredients Breakdown
Key Components of No-Bake Cookie Dough Cups
The success of No-Bake Cookie Dough Cups hinges on the quality and selection of ingredients. Let’s take a closer look at the essential components that make this dessert not only delicious but also nutritious.
– Almond Flour: This gluten-free alternative is a staple in many healthy baking recipes. Almond flour is made from finely ground almonds and is rich in protein, healthy fats, and fiber. Its nutty flavor complements the sweetness of the cookie dough, providing a satisfying base for the cups.
– Coconut Flour: Another crucial ingredient, coconut flour, adds both flavor and texture to the cookie dough mixture. It is lower in carbohydrates compared to traditional flour and is high in fiber, making it a great choice for those watching their carb intake. Coconut flour absorbs moisture, so it helps achieve the right consistency in the dough.
– Sweeteners: The role of sweeteners is paramount in this recipe. Maple syrup and agave syrup are excellent choices for achieving the right level of sweetness while offering a more natural alternative to refined sugars. These sweeteners not only add flavor but also contribute to the overall texture of the cookie dough.
– Coconut Oil: This ingredient serves as a source of moisture and flavor. Coconut oil provides a creamy texture while imparting a subtle coconut taste that enhances the overall flavor profile. It’s also a healthier fat option compared to butter.
– Vanilla Extract and Salt: The importance of these two ingredients should not be underestimated. Vanilla extract is essential for adding depth and richness to the flavor, while a pinch of salt balances the sweetness, making every bite more satisfying.
– Chocolate Chips: The choice of chocolate chips can elevate your No-Bake Cookie Dough Cups. Whether you prefer dark chocolate for its rich, intense flavor or milk chocolate for a sweeter profile, the addition of chocolate chips is crucial for that classic cookie dough experience.
– Optional Toppings: Finally, consider adding optional toppings to take your cookie dough cups to the next level. Crushed nuts, a sprinkle of sea salt, or colorful sprinkles can enhance both the visual appeal and the flavor, making your dessert even more enticing.
Step-by-Step Guide to Making No-Bake Cookie Dough Cups
Preparing the Cookie Dough Mixture
Now that you are familiar with the ingredients, it’s time to dive into the preparation of your No-Bake Cookie Dough Cups. The process is straightforward, allowing you to whip up these delicious treats in no time.
Begin by gathering all your ingredients and a mixing bowl. In a large bowl, combine the almond flour and coconut flour. This dry mixture forms the foundation of your cookie dough. Be sure to mix these flours well to ensure an even distribution of flavors and textures.
Next, in a separate bowl, whisk together the wet ingredients: coconut oil, maple syrup, and vanilla extract. Melt the coconut oil if it’s solid, but be careful not to overheat it. The goal is to have a liquid that blends seamlessly with the sweeteners and vanilla.
Once your wet ingredients are well combined, pour them into the bowl with the dry ingredients. Using a spatula or a wooden spoon, gently mix the two mixtures together. You want to combine them until just incorporated, being careful not to overwork the dough. The consistency should be thick but pliable, resembling traditional cookie dough.
If the mixture appears too dry, add a teaspoon of water or additional coconut oil. Conversely, if it’s too wet, a little more almond flour can help achieve the right texture. The goal is to create a dough that holds together well but is not overly sticky.
Incorporating Chocolate Chips
Now comes the fun part—adding chocolate chips! Sprinkle a generous amount of chocolate chips over the dough mixture. Use semi-sweet, dark, or milk chocolate chips based on your preference. Gently fold the chocolate chips into the dough, ensuring they are evenly distributed throughout the mixture. This step is crucial, as you want every bite of your No-Bake Cookie Dough Cups to be bursting with chocolatey goodness.
At this stage, you can also consider adding any optional ingredients, such as chopped nuts or a touch of sea salt for an extra flavor kick. These additions can enhance the texture and overall taste of your dessert.
Next, it’s time to mold your cookie dough mixture into cups. Use a muffin tin lined with cupcake liners or silicone molds for easy removal. Scoop a generous amount of the dough into each cup, pressing it down firmly to create a solid base. You want to ensure the mixture holds its shape once chilled.
After filling the cups, place them in the refrigerator for about 30 minutes to an hour. This chilling time allows the cookie dough to firm up, making it easier to enjoy without falling apart.
As the cookie dough cups chill, you can prepare any additional toppings or melt some chocolate for drizzling, if desired.
This initial step of preparing your No-Bake Cookie Dough Cups sets the stage for a delightful and satisfying treat that will impress anyone who tries them. Enjoy the process, and get ready to indulge in a treat that combines the nostalgic flavors of cookie dough with the ease of no-bake preparation.
{{image_2}}
The Impact of Mini Chocolate Chips on Texture and Taste
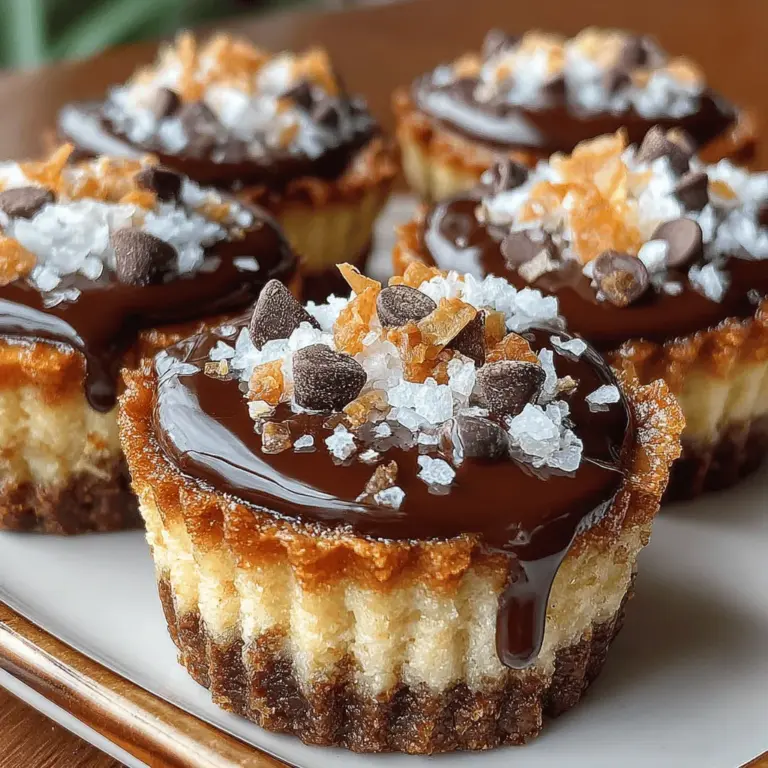
In this No-Bake Cookie Dough Cups recipe, mini chocolate chips play a crucial role in enhancing both the texture and taste of the cookie dough filling. Their smaller size allows them to distribute evenly throughout the dough, ensuring that you get a delightful chocolatey burst in every bite. The slight crunch of the mini chips contrasts beautifully with the creamy, smooth nature of the cookie dough, creating a delightful mouthfeel that elevates the overall experience of this treat.
Molding the Cups
Instructions for Lining Muffin Tins with Cupcake Liners
To start, you’ll need to prepare your muffin tins for the cookie dough cups. Select high-quality cupcake liners that are sturdy enough to hold the filling. Begin by placing a cupcake liner in each cavity of your muffin tin. This step not only makes for easy removal of the cups later but also adds a colorful touch to your presentation. It’s essential to ensure that the liners are pressed snugly against the sides and bottom of the muffin tin to create the perfect mold for your cookie dough cups.
Best Practices for Pressing the Dough into the Liners
Once your muffin tins are lined, it’s time to press the cookie dough mixture into the liners. Use a small cookie scoop or your hands to portion out the dough. Aim for about 1-2 tablespoons of dough per liner, depending on how thick you want your cups to be. Gently press the dough into the bottom and up the sides of each liner with your fingers or a small spoon, making sure to create a well-defined cavity for the chocolate coating. This step is crucial for achieving that iconic cup shape, so take your time to ensure that the dough is evenly distributed and firmly packed.
Melting the Chocolate Coating
How to Melt Chocolate Safely Using a Microwave
To create a silky smooth chocolate coating for your cookie dough cups, melting the chocolate must be done carefully. Start by breaking your chocolate into small, uniform pieces and placing them in a microwave-safe bowl. Heat the chocolate in the microwave in 30-second intervals, stirring well after each interval. This method prevents the chocolate from burning and ensures an even melt. Typically, it takes about 1-2 minutes of heating to achieve the perfect melted consistency.
Ensuring a Smooth Consistency for Coating Your Cups
Once the chocolate is melted, it should be glossy and fluid. If you find it too thick, you can add a teaspoon of coconut oil or vegetable oil to the chocolate to achieve a smoother texture. Stir the oil in until fully incorporated, and you should have a beautifully pourable chocolate ready for coating.
Assembling the Cookie Dough Cups
Pouring Melted Chocolate Over the Cookie Dough
With your cookie dough cups molded and the chocolate melted, it’s time to assemble. Carefully pour the melted chocolate over each filled liner until it reaches the top. Use a spoon or spatula to spread the chocolate evenly, ensuring that the cookie dough is completely covered. This creates a delicious layer of chocolate that perfectly complements the cookie dough below.
Techniques for Tapping the Muffin Tin to Release Air Bubbles
After pouring the chocolate, gently tap the muffin tin on the countertop. This technique helps to release any trapped air bubbles, ensuring a smooth finish on top of your cups. If you notice any bubbles on the surface, you can gently swirl a toothpick or skewer to pop them before the chocolate sets.
Chilling the Cups
Importance of Chilling for Setting the Chocolate
Chilling is a critical step that allows the chocolate to firm up, creating a perfect shell around the cookie dough. This not only enhances the texture of the cups but also helps the layers to adhere together, preventing any separation when you bite into them.
How Long to Chill for Optimal Results
Place your muffin tin in the refrigerator and let the cups chill for at least 30-60 minutes. If you are in a hurry, a 30-minute chill will suffice, but for optimal results, aim for at least an hour. This ensures that the chocolate hardens completely, resulting in a satisfying crunch when you take a bite.
Finishing Touches
Removing the Cups from the Muffin Tin
Once the chocolate has set, it’s time to reveal your creations! Carefully peel away the cupcake liners from each cup. If you find it difficult to remove the cups, you can gently twist or pull at the liner to help release the chocolate. They should come out easily if the liners were properly lined and the chocolate has set well.
Suggestions for Garnishing with Toppings for Added Flair
For an extra layer of flavor and visual appeal, consider garnishing your cookie dough cups with toppings. A sprinkle of sea salt can enhance the chocolate flavor, while a drizzle of melted chocolate over the top adds a decorative touch. For additional crunch, consider adding chopped nuts or a few extra mini chocolate chips. You can also dust the tops with cocoa powder or powdered sugar for an elegant finishing touch.
Nutritional Information
Understanding the Health Benefits of Your Treats
These No-Bake Cookie Dough Cups not only taste incredible but also boast some health benefits due to the wholesome ingredients used. Each serving generally contains around 150-200 calories, depending on the specific brands of ingredients you use and the portion size.
Breakdown of Calories and Macronutrients Per Serving
– Calories: Approximately 160
– Protein: 3g
– Fat: 9g
– Carbohydrates: 18g
– Fiber: 1g
– Sugar: 8g
The relatively low calorie count, combined with the use of natural sweeteners and healthy fats, makes these cookie dough cups a guilt-free indulgence. Using almond flour instead of traditional flour not only enhances the nutrient profile but also makes these cups gluten-free, catering to various dietary needs.
Highlighting the Health-Conscious Ingredients Used in the Recipe
The recipe showcases ingredients that offer health benefits while still satisfying your sweet tooth. Nut butter provides healthy fats and protein, while oats contribute fiber and essential nutrients. Mini chocolate chips, when chosen wisely (such as dark chocolate varieties), can also deliver antioxidants and lower sugar content compared to regular chocolate.
Conclusion
No-Bake Cookie Dough Cups are a delectable and healthier alternative to traditional desserts, offering a delightful combination of rich chocolate and cookie dough flavors without the need for baking. Perfect for satisfying your sweet cravings or impressing guests at your next gathering, these cups are not only easy to make but also customizable to suit your tastes. The recipe highlights simple, wholesome ingredients that contribute to a guilt-free indulgence, making it a must-try for anyone seeking a delicious yet nutritious treat.
Enjoy the satisfaction of creating your own dessert masterpiece, and delight in every bite of these delightful cookie dough cups! Whether you serve them at a party, enjoy them as an afternoon snack, or simply keep them on hand for a late-night treat, these cups are sure to become a favorite in your dessert repertoire. So gather your ingredients, follow the steps, and treat yourself to this simple yet indulgent recipe today!
